The ContentForces Content and Campaign Management System allows you to control the access to pages through the use of usernames and passwords. According to user identity, the system will permit or forbid the display of the pages and test whether a user requesting the page has an assigned required role. The manager of the website can create a list of the roles and assign them to particular users. As a result, it gives him the possibility to select which sections of Intranet content will be available for which users.
This is a three step process:
1. Add a login to a contact
2. Assign login roles to pages
3. Assign login roles to a contact
1. ADDING/EDITING CONTACT LOGIN
 Video Manual. Adding/Editing Contact login
 Go to CONTACTS/Contacts tab and select a contact
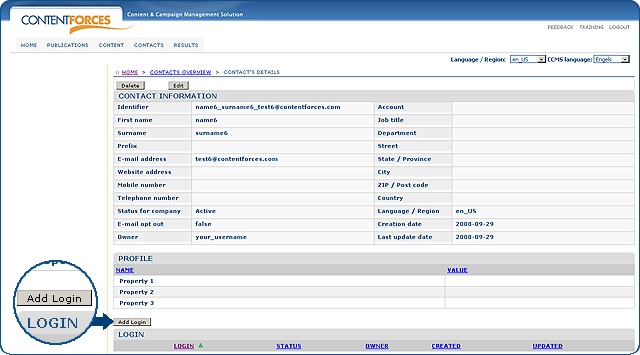
If your site has Intranet, you will see a LOGIN part at the bottom of the CONTACT'S DETAIL page.
If a specific contact does not have a LOGIN yet, then you will see a button with 'Add Login'.
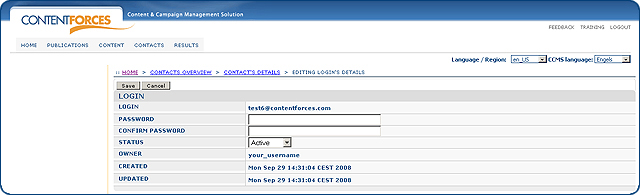
 When you click on the 'Add Login' button you will reach the EDITING LOGIN'S DETAILS page. On this page you can input a password for a specific contact and set LOGIN status to Active/Not active.
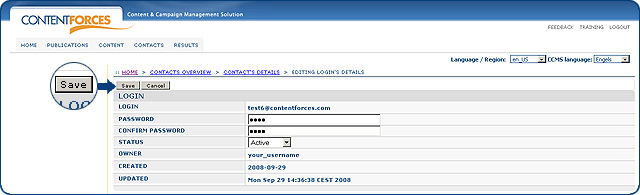
After that you can click 'Save' or 'Cancel' to discard.
If a specific contact already has a login, then you will see the 'Delete' and 'Edit' buttons next to it (on the CONTACT'S DETAIL page)

When you click on 'Edit' you will reach EDITING LOGIN'S DETAILS page. On that page you can input new password for specific Contact and change LOGINs status.
After that you can click 'Save' or 'Cancel' to discard.
When clicking the 'Delete' button next to a login, the enquiry to confirm will be displayed. When the action to delete a contact's LOGIN is approved, click the 'OK' button. Otherwise click 'Cancel' to discard the operation. Both buttons are located in the pop-up window.

LOGIN ROLES IN CCMS
Login roles allow you to give different access to your website
Login roles are assigned to pages in the taxonomy tree
You can assign one login role to many pages in the taxonomy
You can assign many login roles to one page in the taxonomy
You can assign login roles for each language/region or for all language/region versions of a website
You do not have to assign a login role to every page in the taxonomy - subpages inherit login roles
All pages are visible in the menus, but if a user does not have the right role to see content of specific pages - he will be redirected to a login page
How DO login roles WORK?
First you have to assign some login roles to pages in the taxonomy. Then you have to assign those roles to contacts. This makes a connection between contacts' login and access to the taxonomy. In other words, a specific contact will only have access to those pages, which login roles he has.
2. Assign login roles to pages
Video Manual. Assign login roles to pages
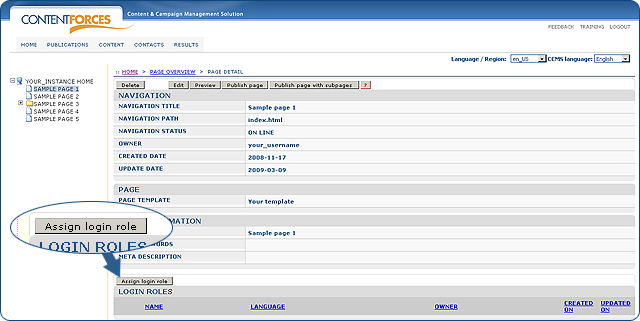
 Select a page from the taxonomy tree
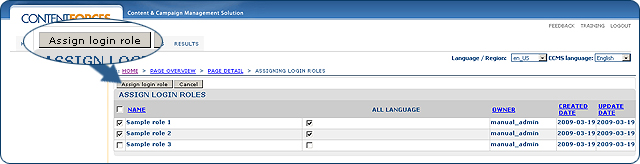
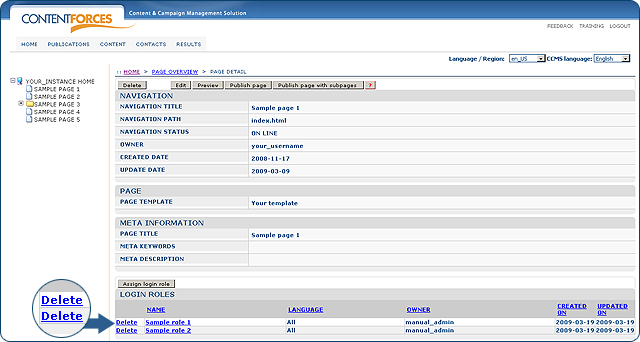
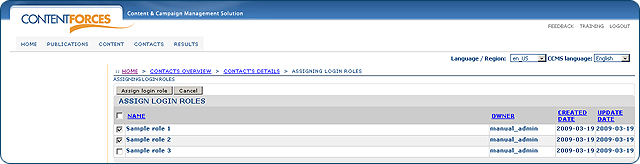
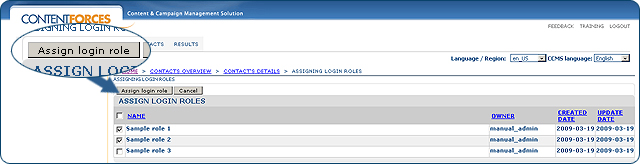
You will see a LOGIN ROLES section. Click the 'Assign login role' button
Select the login roles you want to assign to that page

Tick boxes in the 'All language' column if you want to setup login roles in all languages/regions of your website
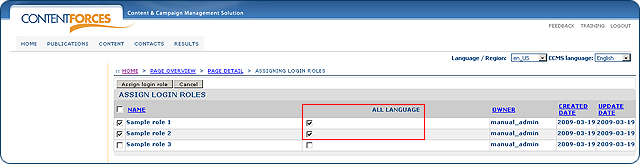
Click the 'Assign login role' button to save changes, or 'Cancel' to discard them
Login roles are assigned to a page
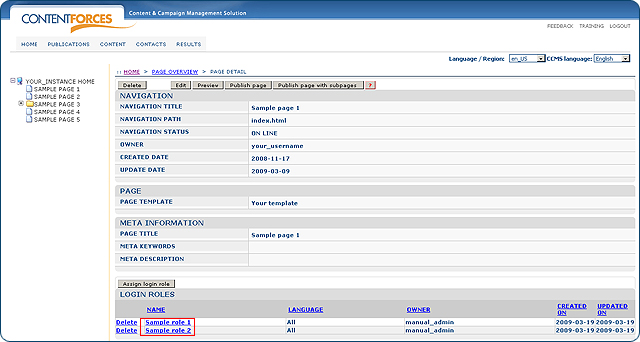
If you want to unassign a login role - click 'Delete' next to a selected login role and confirm deletion
3. Assign login roles to contacts
Video Manual. Assign login roles to Contacts
Go to CONTACTS/Contact tab and select a contact
At the bottom of the contact you will see a LOGIN ROLES section. Click the 'Assign login role' button

Select the login roles you want to assign to that contact
Click the 'Assign login role' button to save changes, or 'Cancel' to discard them
Login roles are assigned to a contact

If you want to unassign a login role from a contact - click 'Delete' next to a selected login role and confirm deletion

