 Video Manual. Setup Start/End date
SETUP START/END DATE
This part of the manual is for Clients who have an Agenda component on their website. An Agenda is used to show some pages as "Events" on a Calendar - only in a specified period of time.
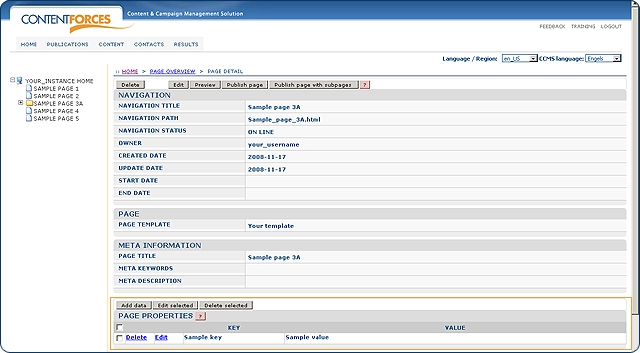
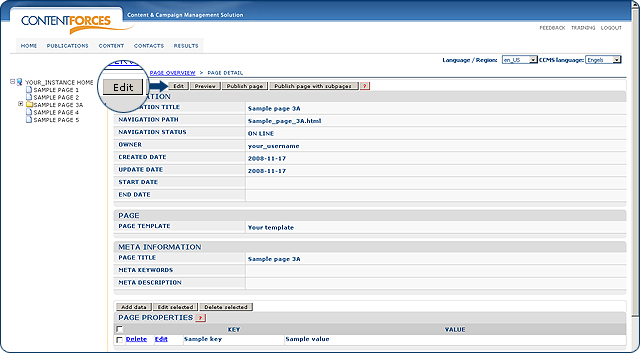
 To setup Start/End date for a specific page you need to choose that page from the taxonomy tree. On PAGE DETAIL you have to click on the "Edit" button.
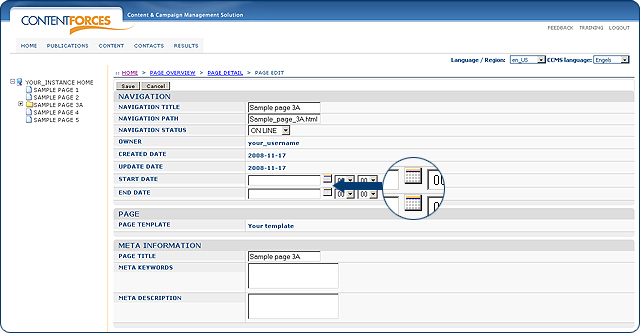
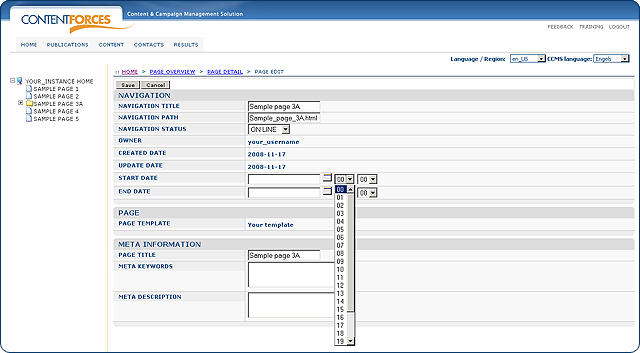
Now you can see two blank fields by START DATE and END DATE. Click on the small calendar icon by each field.
Now choose the right date for START DATE and END DATE from calendar.
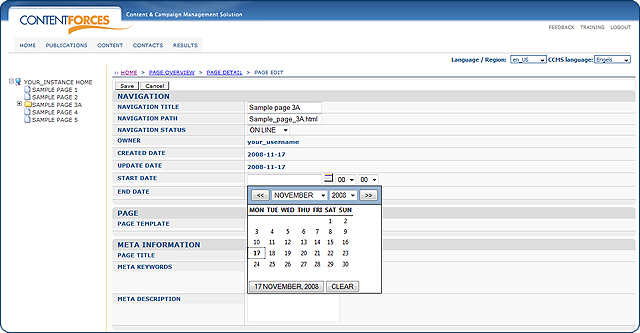
You can even setup an exact hour for START DATE and END DATE.
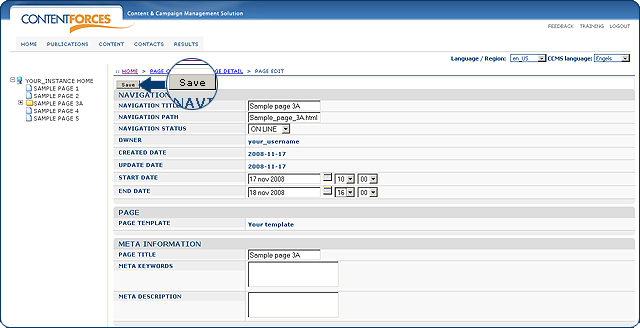
Click the "Save" button to save changes or "Cancel" to discard changes
Video Manual. Assigning Labels
ASSIGNING LABELS
This part of the manual is for Clients who have the Personalized Home Page component. Using labels allows you to categorize content. In example: if there are pages in the News section, we can create labels such as Europe, North America, South America, Africa, Asia, Australia and then add these labels to different news. So when a website visitor will click on the category "Europe" (on the webpage) - he will only see news with the label "Europe".
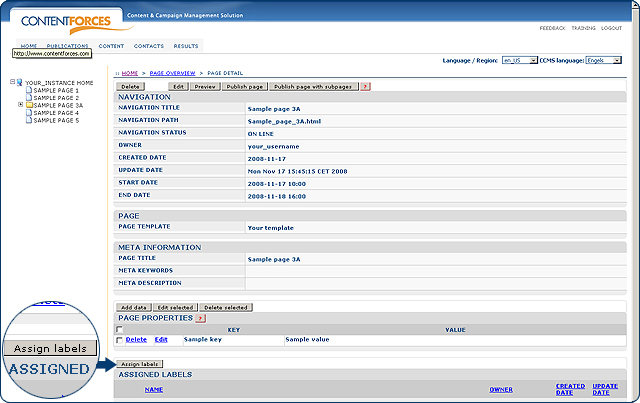
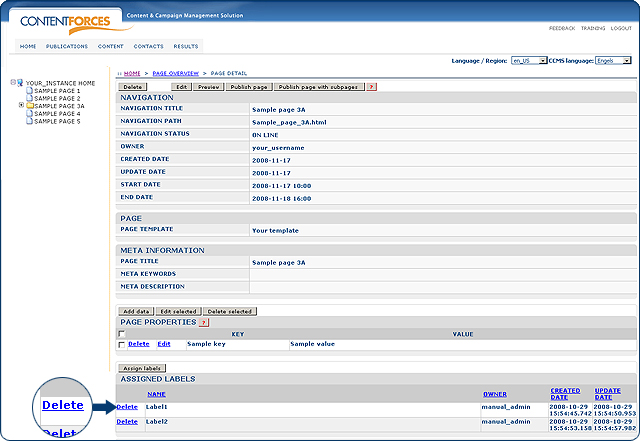
To assign labels for a specific page you need to choose that page from the taxonomy tree. Now you will see a button called ASSIGNED LABELS. To assign some labels - click on "Assign labels" button.
On the ASSIGN LABELS page you will see the list of all labels that can be assigned/deassigned (tick box/untick box)
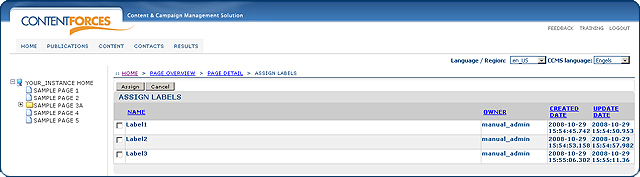
Click the "Assign" button to save changes or "Cancel" to discard changes

Now under the part called ASSIGNED LABELS you will see the list of assigned Labels. You can deassign them using the "Assign labels" button or just click the "Delete" button by specific Label.
Video Manual. Adding Subscription to Notification
Subscription To Notification
The Subscription To Notification component is a convenient way to inform your Intranet visitors about the changes in content made on your website. In order to enable this function, the Intranet users have to be subscribed by the website manager to certain articles on your website. The mechanism behind it is based on the structure of your taxonomy tree – every article has a contact list assigned to it. The contact list comprises of contacts that will get notifications about the changes in the article the contact list is attached to. When the website manager updates a particular article, he can manually trigger off sending a notification that contains details about the changes along with a direct link to its updated version.
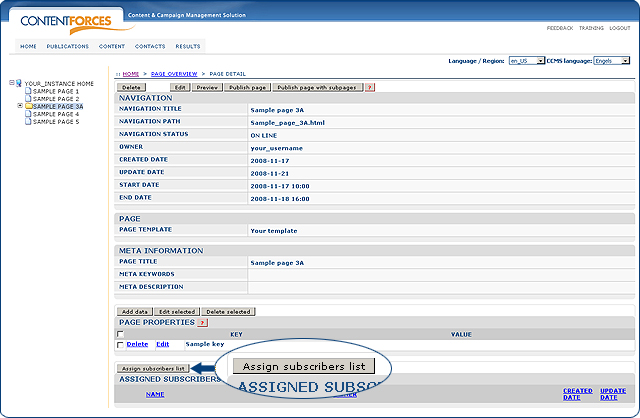
To setup Subscription to Notification for a specific page you need to choose that page from the taxonomy tree. On PAGE DETAIL you have to click on the "Assign subscribers list" button under ASSIGNED SUBSCRIBERS LIST TO EMAIL ALERT.
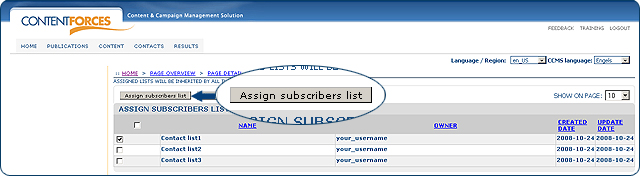
On ASSIGNING SUBSCRIBERS LIST you will see availaible Contact lists

Select the Contact list you want to assign and click the "Assign subscribers list" button to save changes or "Cancel" to discard changes
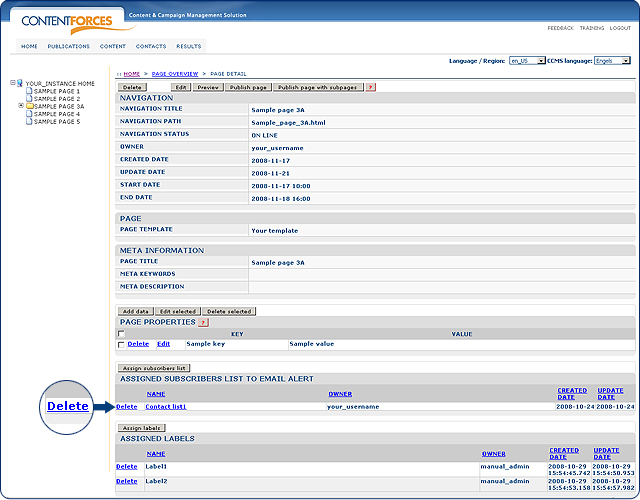
Now under the part called ASSIGNED SUBSCRIBERS LIST TO EMAIL ALERT you will see the list of assigned Contact lists. You can deassign them using the "Delete" button by a specific list.
Video Manual. Page properties
PAGE PROPERTIES
We sometimes use Page properties for some additional settings on the website. We have improved that function to make it easier for managing.
 To add a new page property, you need to choose a page from the taxonomy tree. You have a place with Page properties on PAGE DETAIL. To add a new one, you need to click the "Add data" button.
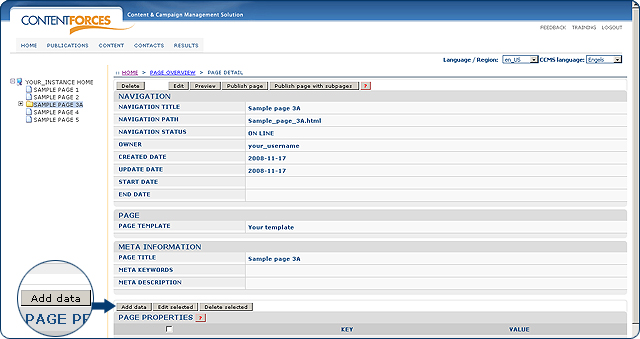
After clicking on the "Add data" button you will be moved to the new page, where you need to fill in the "Key" and the "'Value" of page property.

After saving, your newly added page property is visible on the detail page in the part "Page properties". When you already have some properties added, you can edit or delete them one by one by using the "Edit" and "Delete" links next to the items which you want to edit/delete. You can also edit/delete a couple items at once. To do this, you need to mark some properties by checking the check-boxes next to them and using one of the action buttons above page properties: "Edit selected" and "Delete selected".